1950 Chevy Transformation
By: James Wilder
Not an Assembly Line.
Have you ever considered owning a custom car? A car that bears little resemblance to its assembly line shape? This article chronicles the steps I went through to transform my 1950 Chevy Styleline Coupe from stock to custom.
The Ultimate Mod is Altered Steel
When most people think of customizing a car, they think of wheels, tires, paint and some engine mods.
But the ultimate mod is altered steel.
To radically alter the shape of a car takes an artist's eye and the precise hand of a metal sculptor.
The result is a one-of-a-kind custom, a rolling sculpture, an original work of art.
The Builder
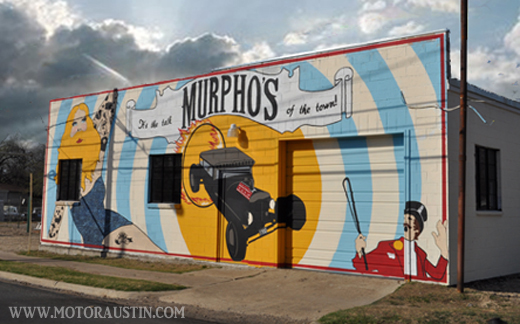
To build a complete custom from the ground up, with a chopped roof and air bags (chopped and dropped), the choice was easy for me. I chose Murpho's Rods and Customs in South Austin.
I met the owner, Murph, when they first set up shop in south Austin in 2011. They knew the custom car scene was growing fast in Austin and they wanted to be a part of it.
I attended some of their shop events (ok, parties) over the months and I appreciated how easy they were to talk with. I floated the idea of building a custom. I raised all my concerns and doubts. The conversation ended with "Let's do it!"
Here are the main reasons I chose Murpho's to do the build:
- They were willing to work in phases, as my budget allowed.
- They were committed to making sure the project was a success.
- They have years of experience building customs.
- Murph's personal ride is a 1950 Chevy custom.
Anytime you attempt a project of this scope there are going to be risks. However, I felt confident that I selected a highly skilled builder and a competent business owner. We also adequately identified and addressed the risks of the project.
The next step was to find a good car.
The Search
I probably spent a year monitoring Craigslist, some hot rod forums and a few classic car dealers.
I checked out several cars but rejected them if they were disassembled, didn't have a title or I didn't like the seller (bad vibe).
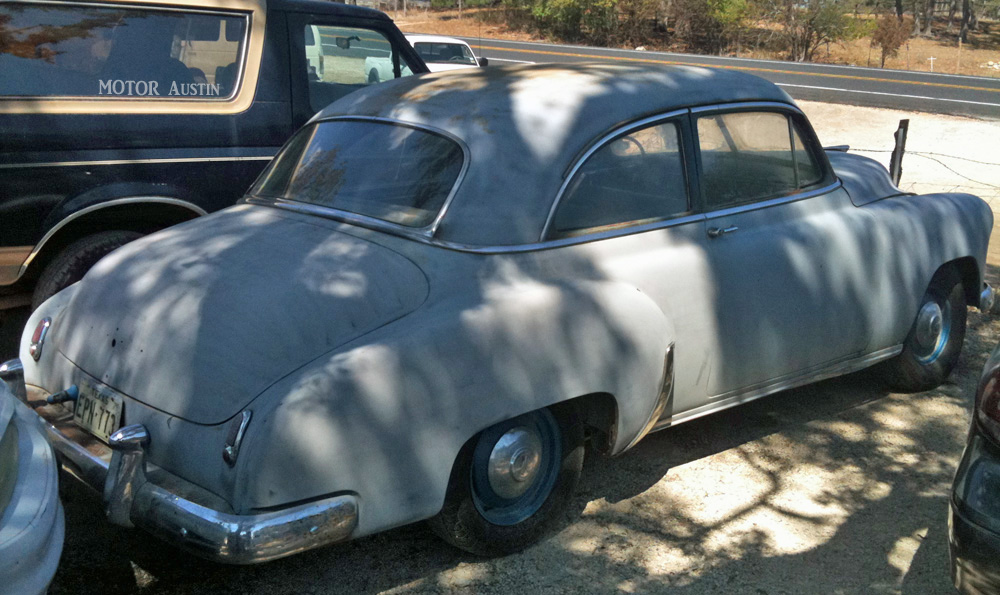
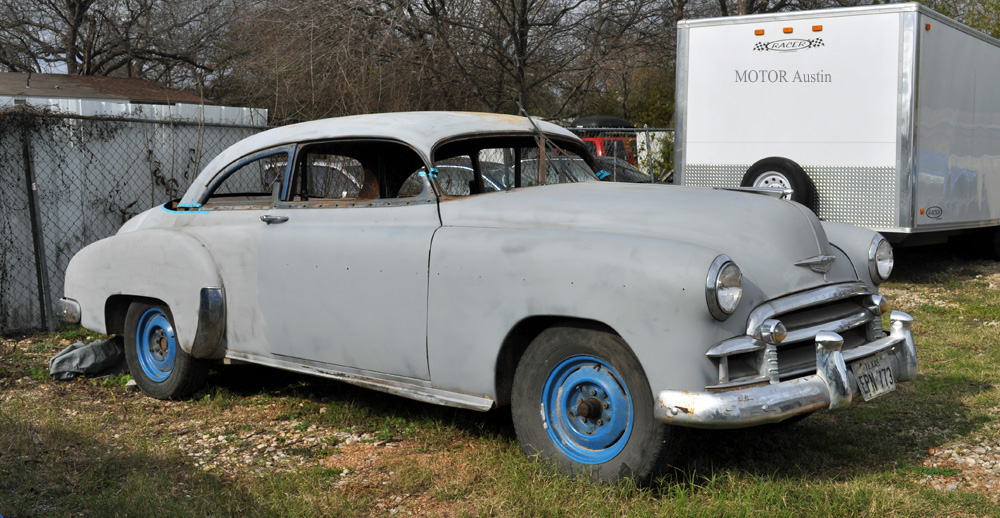
I finally found an all original 1950 Chevy Styleline at a tiny used car lot just outside of New Braunfels.
The body was in great shape for a 60 year old; no rust or hidden damage found. It had a clear title and was in running condition.
I felt pretty comfortable about the condition of the car and about buying from the seller.
The search was over.
I bought it on the same day and returned the next day to take her home.
The Plan
Now that I had the car in my garage I was ready to meet with Murpho's again to come up with a plan.
Because I had a tight budget I wanted to make sure that at a minimum I would have a solid running vehicle. The last thing I wanted was to run out of money and have a bunch of parts to bring back home and fill the garage.
The project would be broken up into individually funded phases. The car would always be a roller at the end of each phase. They also agreed to store the car if I ran into cash flow issues (and I did. Will discuss later).
Everything was a go!
I bought two sturdy plastic storage bins to hold all the small bits that would be removed from the car while they were working on it. I also bought a car cover to provide protection if they had to roll it outside for a while.
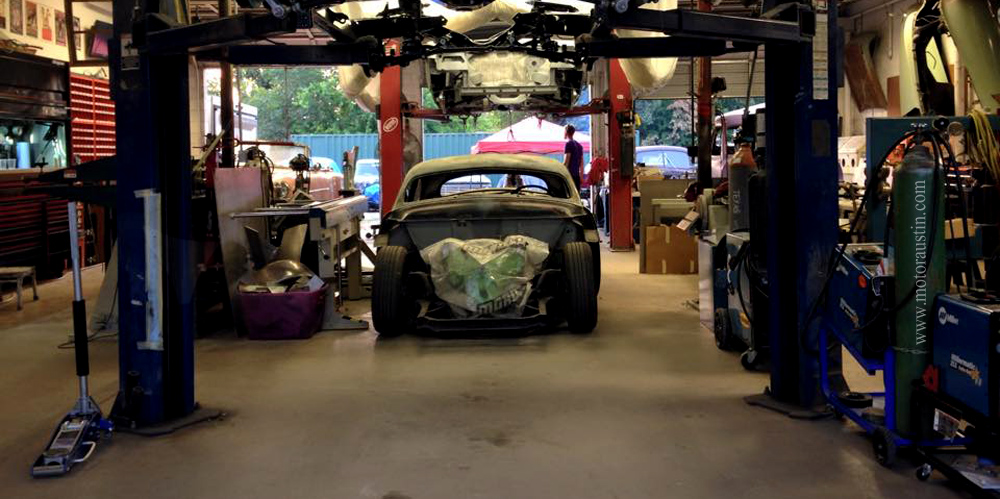
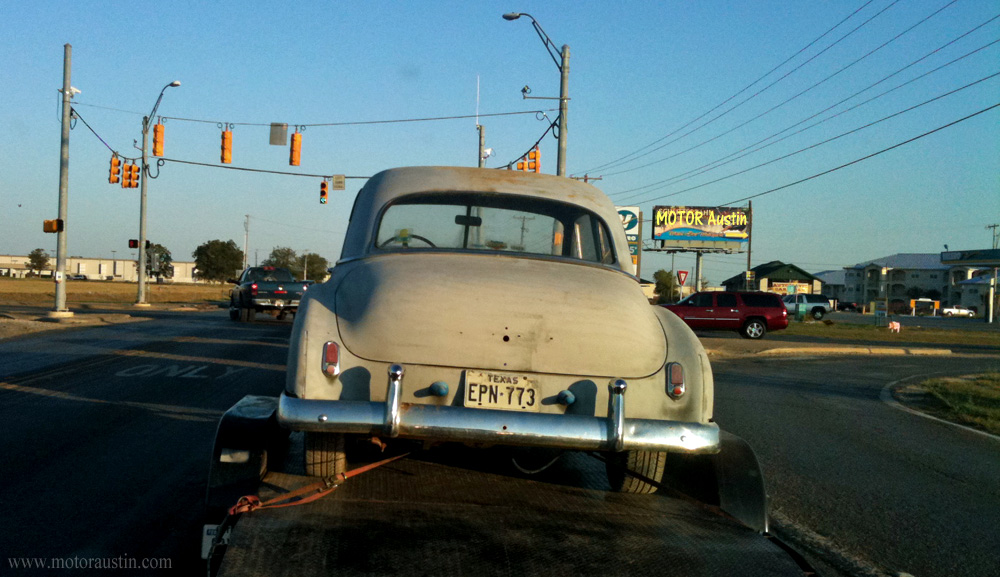
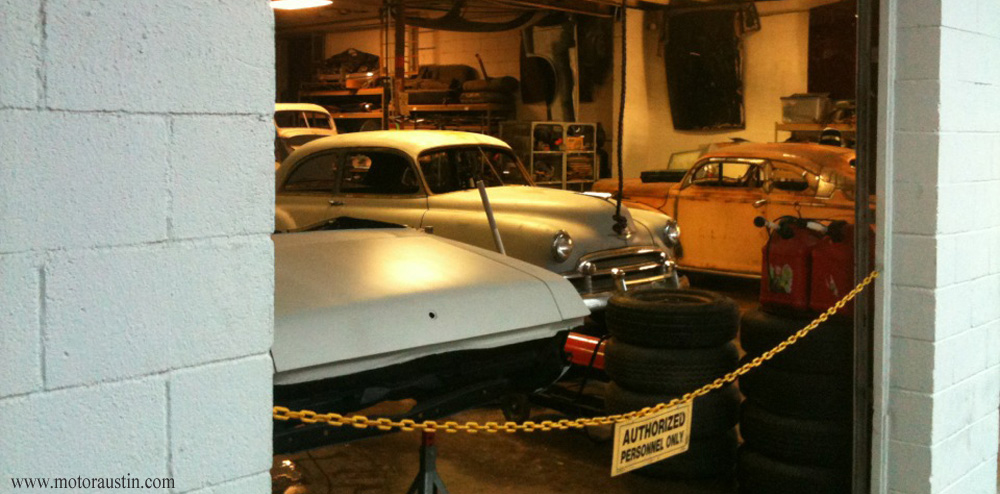
I trailered the Chevy to the shop to begin the transformation (Photo above). She even looks better just hanging out in the shop!
The project phases and order were pretty logical.
The key thing was to ensure the car was a roller at the end of each phase. If something happened to me or my money stream, at least the car could be rolled onto a wrecker. This was very important!
The phases we decided on were:
- Top chop.
- Rust repair and body work.
- Notching the frame for air suspension.
- Mustang II front end.
- Glass.
- Air bags and compressor unit.
- Engine and transmission.
- Paint.
- Final assembly (12v conversion).
At the end of each phase we would discuss and agree on the scope of the next phase.
Needless to say, the first phase, cutting the roof off, well, that should be pretty exciting!
The Chop
Who do you trust to cut the roof off your car? Yeah, choose wisely!
The chop was probably the most labor intensive phase. It was also the most fascinating part as I got to see how the original bubble shaped roof was transformed into a sexy streamlined shape.
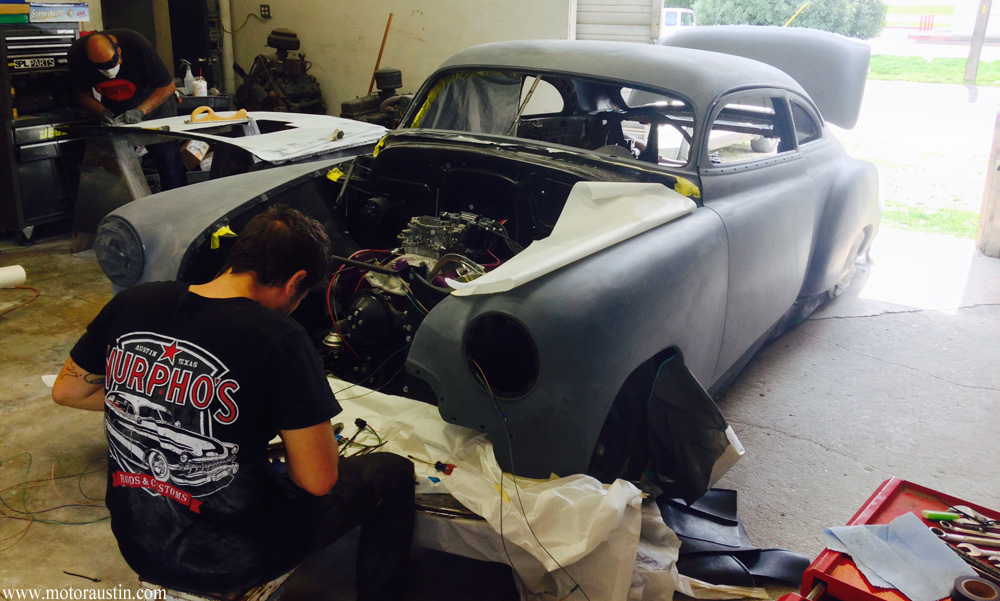
But wait! Before taking a saw to the roof, an elaborate bracing structure was created to keep the body from warping.
Once the bracing was in place the roof was completely cut off, including the window frame around the doors.
About four inches of the front roof pillars (A Pillars) were cut out, as you see in the photo above.
After lining up the A pillars, you can see that the roof moved forward by a few inches (see above and below photos).
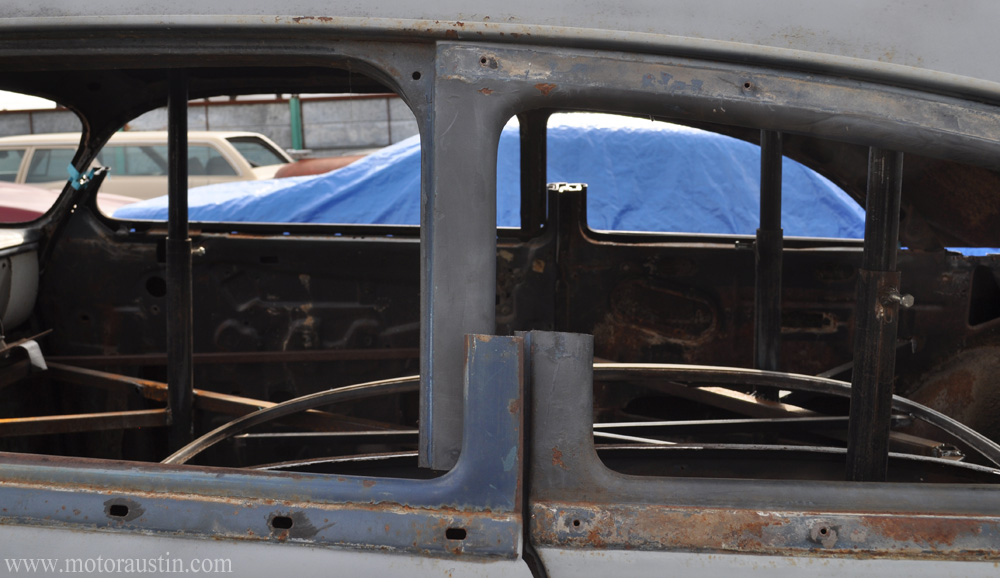
Note how the B pillars don't line up. That's not a problem. The B pillars will be reconstructed and angled forward, further enhancing the streamline flow.
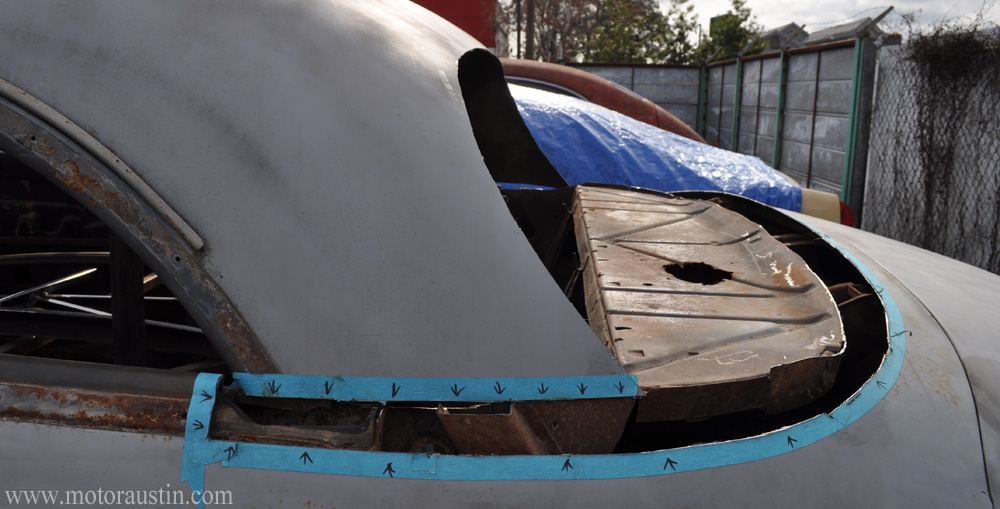
The rear window was cut completely out, leaving about a four inch border around the top and sides (see photo above and below).
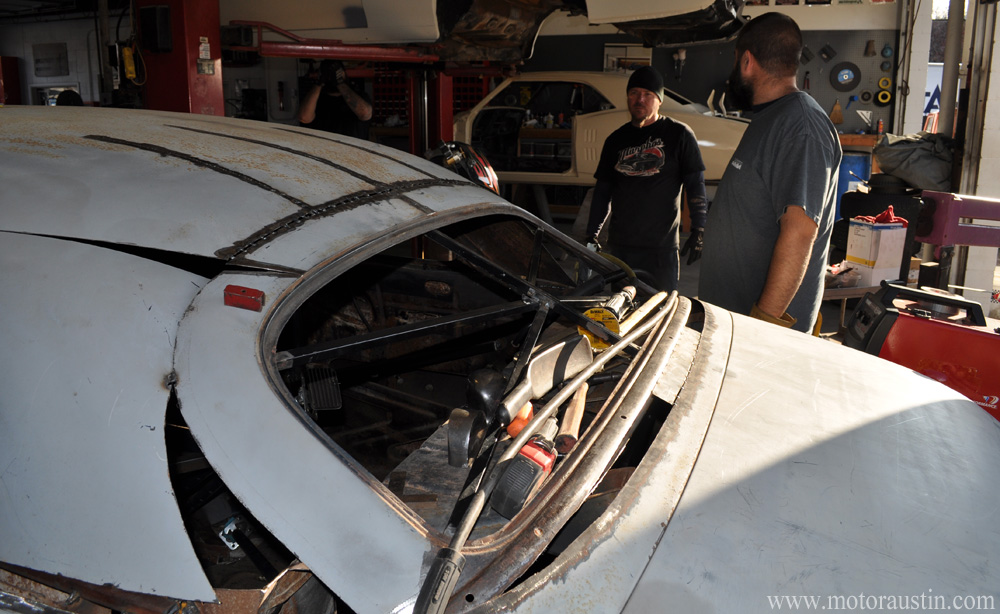
Murph eyes the position of the rear window to make sure the lines flow. It has to be perfect before any further work is done.
Now it starts to make sense. Take a little time to stare at the details of this photo.
Since the roof moved forward by a few inches the rear window section now lays flatter giving it more of a fastback look.
With the roof and rear window positioned properly it's time to start filling in the gaps. Note the slight gap at the bottom of the rear window and the larger gaps on either side of the window.
Also note the interesting slices in the roof, giving it the flexibility needed to align to the new position of the rear window.
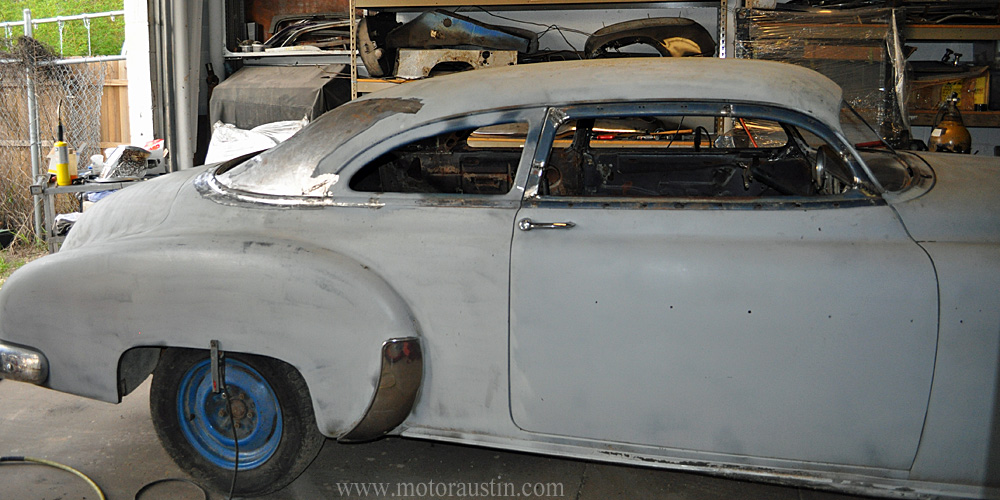
The chop is almost done. The doors have been reconstructed. The B pillars are now aligned and angled forward. The gaps around the rear window have been filled. The roof was finessed to flow smoothly to match the new slope of the rear window. That's a lot of work.
Watching this whole process was quite educational and amazing. Very few people understand or appreciate the time and skills required to do this type of metal work. It is Art.
Next
We're not done yet! In the next section I'll show you the completed project.

In this section I will briefly touch on the most important parts of the build, such as:
- Front End
- Rear End
- Engine
- Paint
- Electrical
- Glass
- Tires
I will also list some of the businesses and challenges in the summary.
Front End
The original 1950 Chevrolet front suspension was replaced with a more modern design based on Ford's Mustang II. There are kits available that include all the components needed.
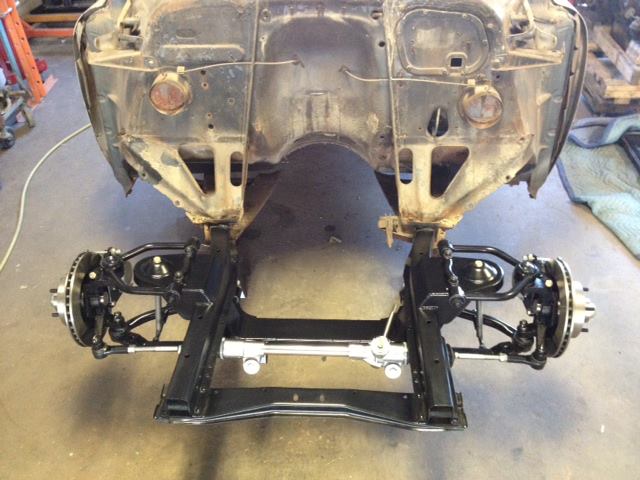
The benefits of this new front end are many. It is lighter. It has rack and pinion steering which requires less effort to steer the car. It also makes the steering feel more responsive.
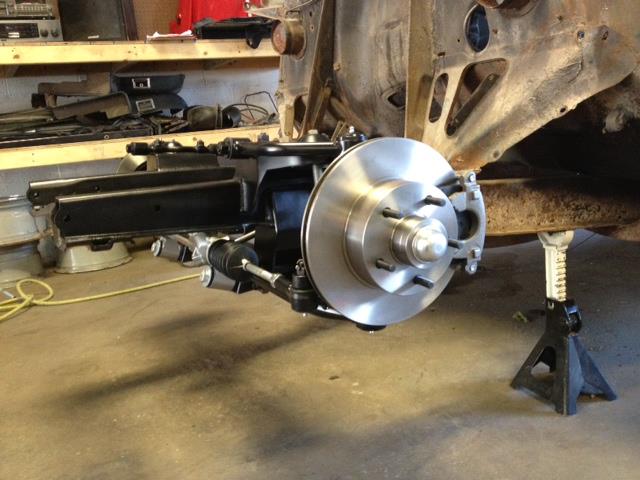
The kit also gives you modern front disc brakes to improve stopping power.
Rear End
The photo below shows some of the extensive work done on the rear end.
Since the car will have air bags, the frame had to be notched and reinforced with steel tubing. With air bags deflated, the rear axle ends up in the trunk.
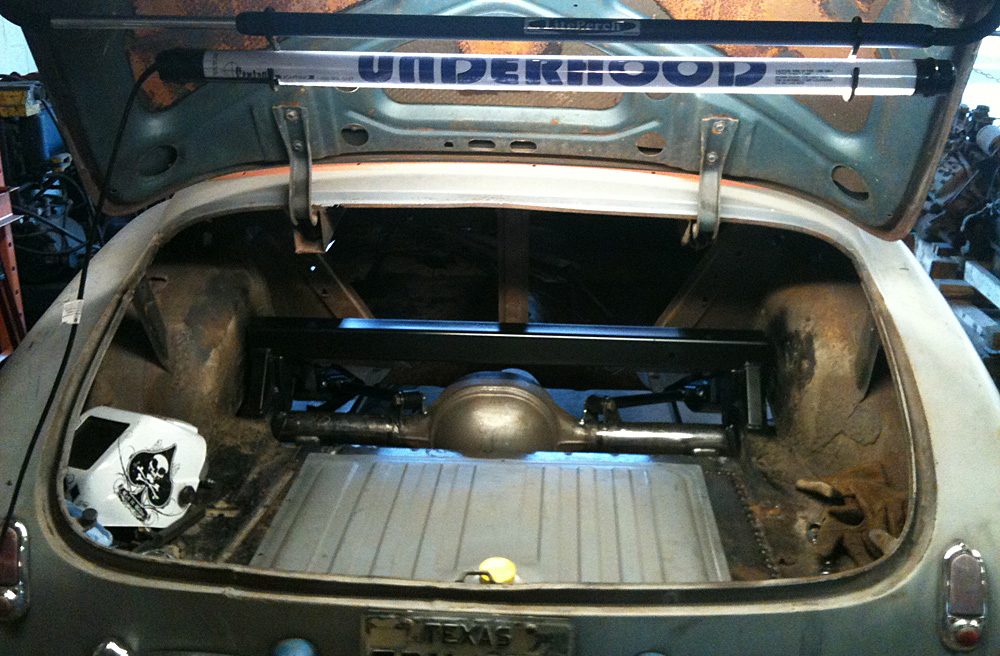
Also note the Ford 9 inch rear end. The Ford 9 inch is appreciated by many customizers for its durability.
Engine
I knew I wanted a small block Chevy V8 to power the car. I figured I'd buy a crate engine, but something better came along.
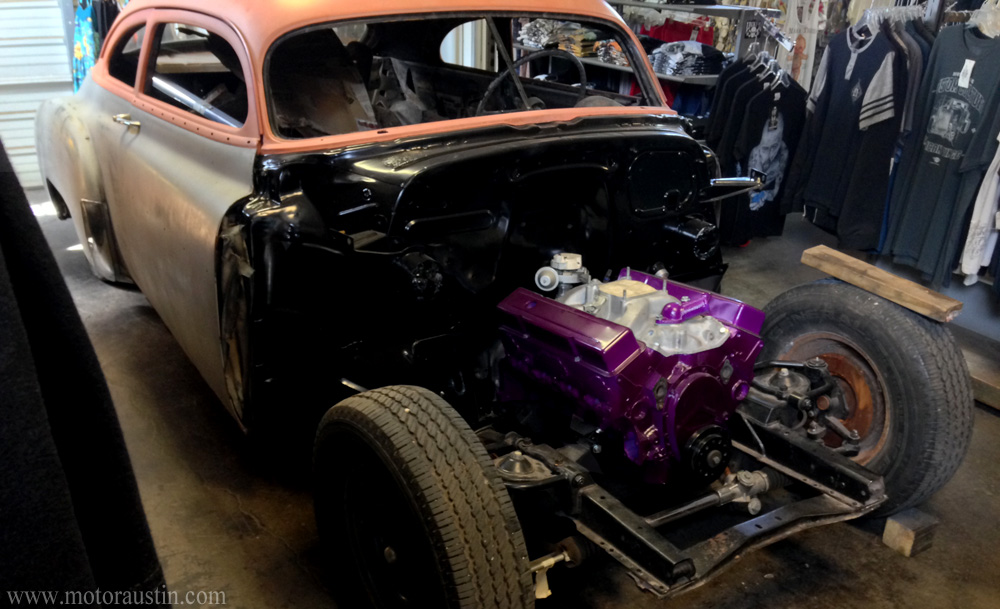
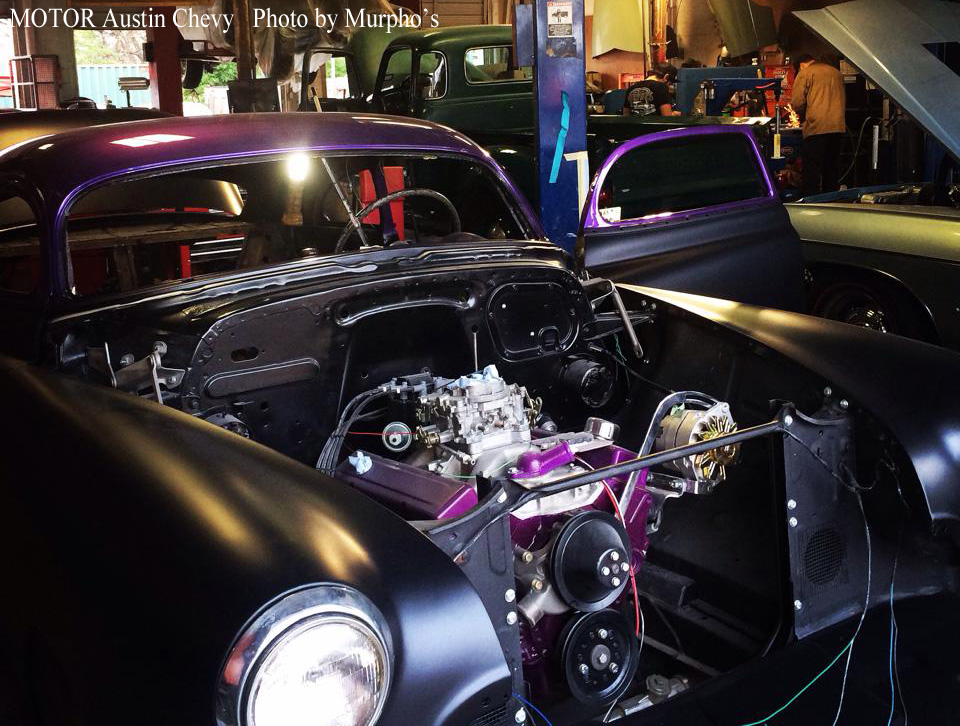
When it was time to acquire the engine there happened to be a 1968 Impala in the shop. The owner of the Impala was getting a new engine, replacing the existing 327 cubic inch V8. The 327 was in great condition, so a deal was made and it became the powerplant for the 50 Chevy.
Electrical
The original 6 volt system was converted to 12 volt. Chevrolet used a 6 volt system until 1955 when it changed to a 12 volt.
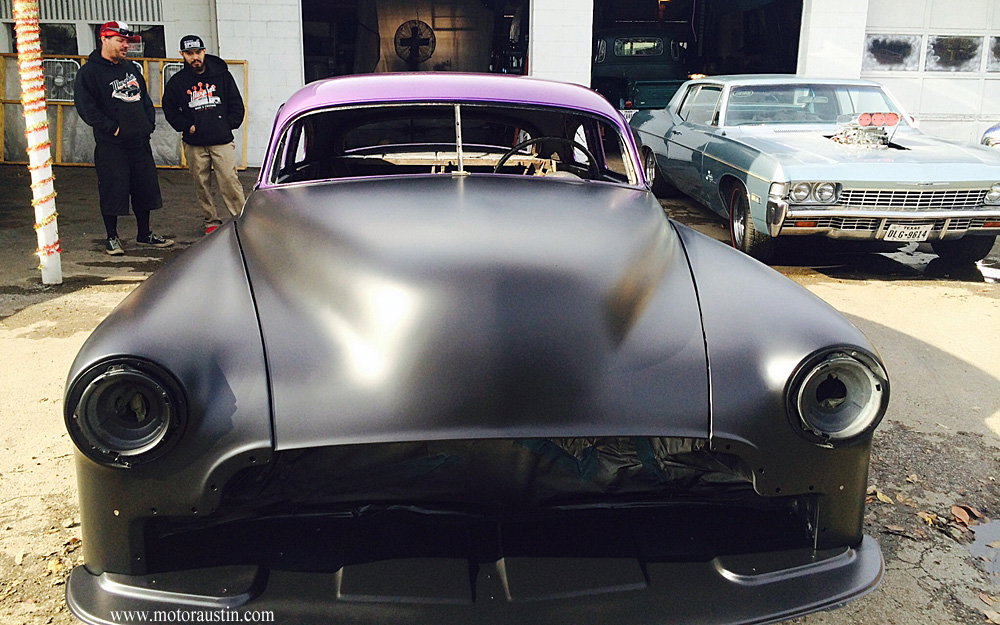
Notice also the door handles have been removed and the remaining holes were filled. In addition, the gas tank filler door on the left rear fender was removed and filled in. This further accentuates the smooth lines of the car.
Paint
The paint was done in-house by Murpho's.
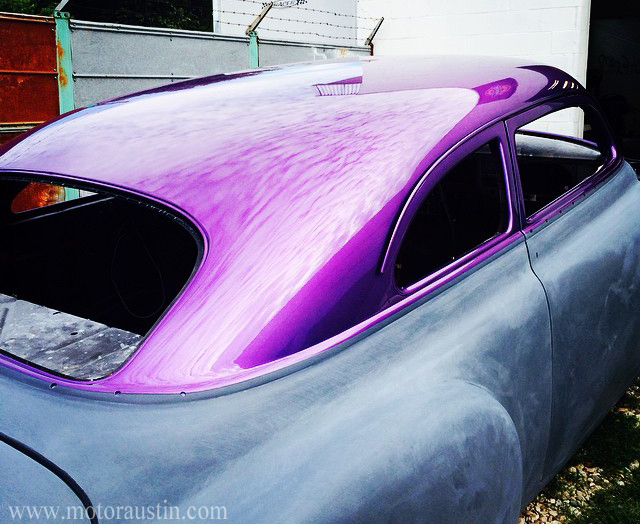
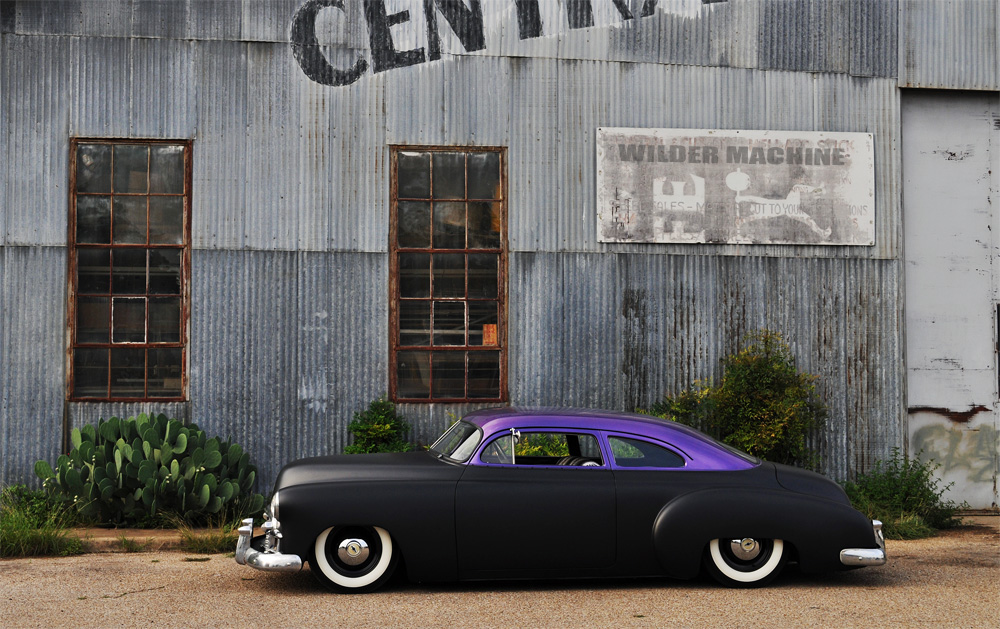
The paint used on the roof is a shade of purple pearl. The fine pearl in the paint causes it to change shades depending on the lighting.
I chose purple pearl because I had a Harley-Davidson motorcycle that had a beautiful Concord Purple Pearl factory paint job.
The body gets the flat black treatment. Flat black, or any flat paint, does a wonderful job of reflecting light and accentuates the curves of the car.
Final Assembly
All the major work is done. At this point it was a matter of connecting all the parts.
Finished
It is finished. For now.
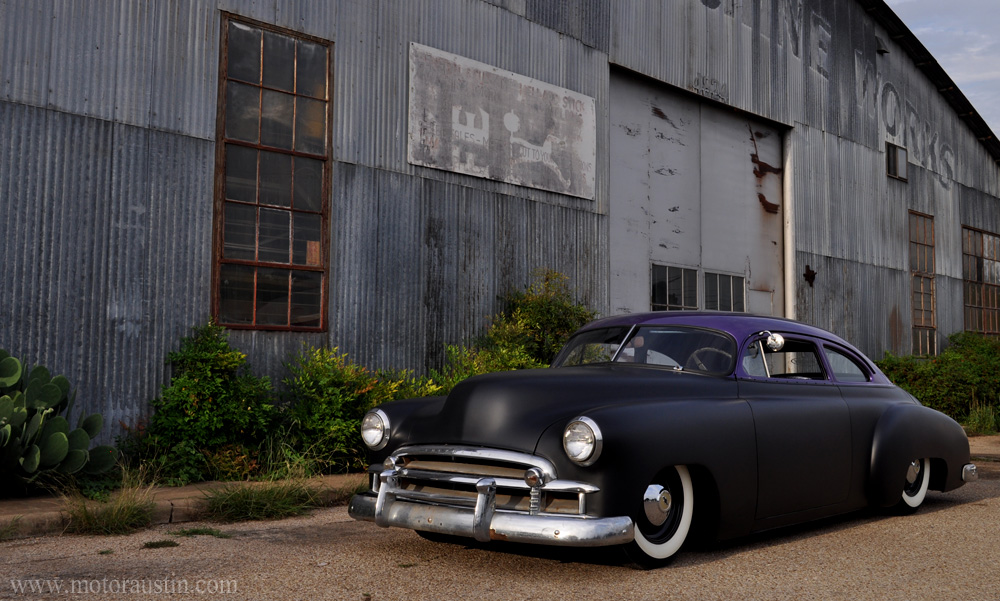
From humble, but classic, grocery getter...
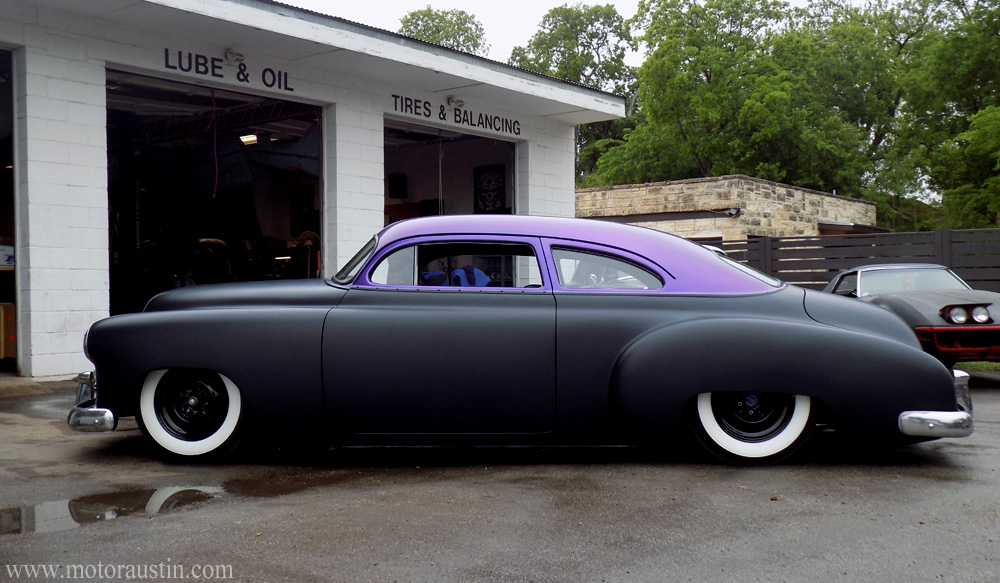
To a beautiful custom. What a transformation!
Photo Shoot
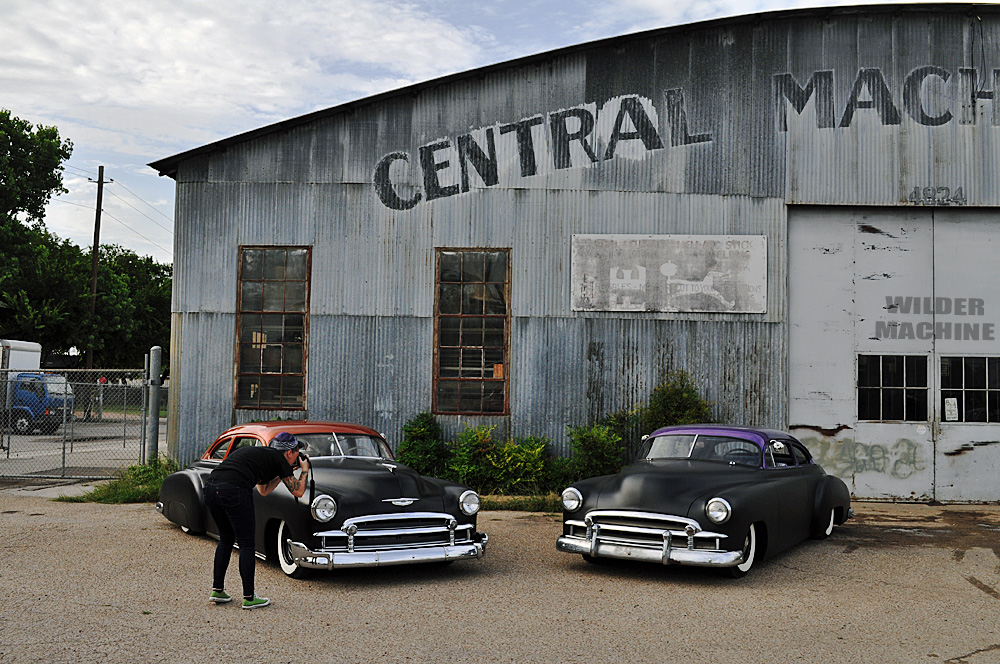
After completing the car Murpho's used a professional photographer to do a photo shoot. I took my own shots.
Other Businesses
Not every shop can do everything. This section lists some of the businesses utilized for parts of the project.
Speedy Align on Oltorf did the alignment. Murpho's sends all their cars to them.
The front windshield and side windows had to be cut to work with the chopped roof. Cutting 50 year-old glass, without breaking it, is a rare skill. Murpho's used Bernie's Custom Glass to do this work. He is based out of California, but he came to Austin to do several projects for Murpho's.
The wheels were powder coated.
The tires are BF Goodrich 3 inch whitewall 640-15, purchased from Coker Tire.
The exhaust system was done by Muffin Mufflers in Austin.
Challenges
This build did not come without challenges!
About half way through the build my job was outsourced! Thankfully, I had an option to join the new company and I took it. However, I stopped the build for about six months until I felt my job was stable.
And of course, the next challenge was money. The build was about twice as much as I anticipated. From what I hear, that's about right.
For the second half of the build, I created a spreadsheet of all the parts, work, and labor required to finish the project. Although this was an estimate, it gave me a better idea of the actual cost of the rest of the build.